Provide Data to OXFORDIA
This page is for data administrators — the people who decide what data lives on an OXFORDIA Node and who is allowed to compute what against it.
Data administrators work through the node's web admin interface, logged in as an authorized administrator on their institution's identity provider.
1. Log in to the dashboard
Navigate to the URL of your institution's OXFORDIA Node. Log in with your institutional account.
The dashboard lists all datasets currently loaded on the node.
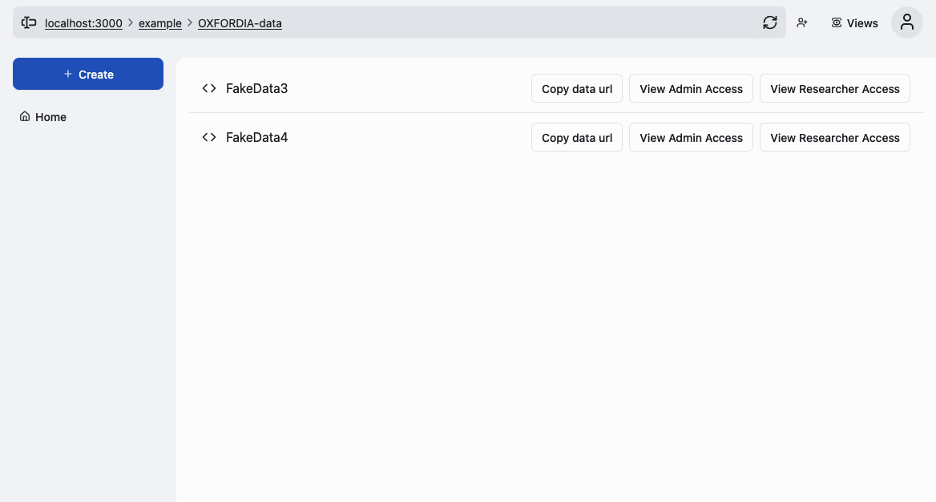
2. Upload a dataset
Click + Create to upload a new dataset.
Currently, data must be provided as a standardized CSV matching the schema expected by the relevant Data Plugin. More flexible ingestion methods are planned for future releases.
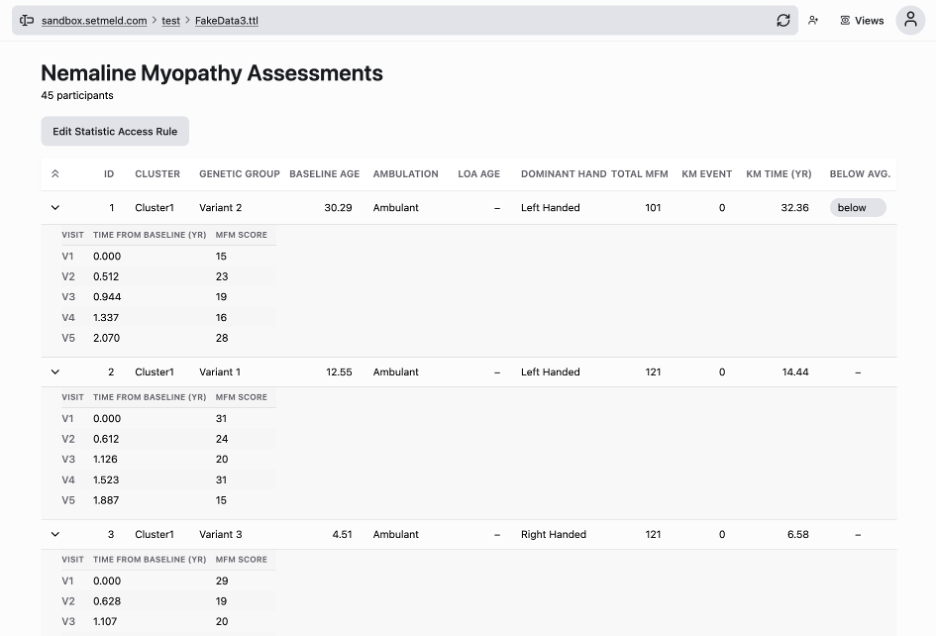
Once uploaded, the CSV is processed, converted to RDF, and stored in the node's triplestore. The dataset becomes visible in the dashboard and can be viewed in the plugin's data table view.
3. Share data with collaborators at your site
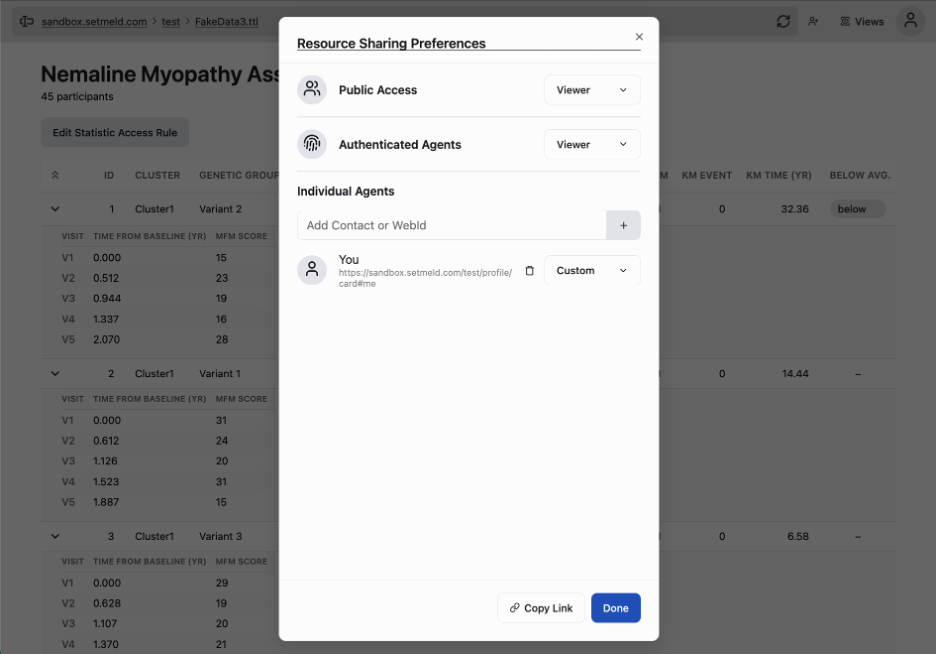
To allow other administrators at your institution to manage a dataset, use Resource Sharing.
Open the dataset, click Views, and open the Resource Sharing dialog. Add collaborators by WebID or contact. You can set their access level (Viewer, Editor, etc.).
Resource Sharing vs. Statistic Access Rules
Resource Sharing grants access to the raw data. Use it only for colleagues at your own site who need to manage the dataset. To allow external researchers to compute against the data without seeing individual records, use Statistic Access Rules instead.
4. Author Statistic Access Rules
The most important configuration on any OXFORDIA Node is the Statistic Access Rule (SAR) editor. This is where your institution makes its actual policy choices: which researchers may compute which statistics against which fields, and under what constraints.
Open a dataset and click Edit Statistic Access Rule.
What a rule specifies
Each SAR covers one dataset and contains:
| Field | Description |
|---|---|
| Allowed Agents | WebIDs of researchers (or named groups) who may query this dataset |
| Statistic | Which computation is authorized — mean, kaplan-meier, etc. |
| Graph Path | Which field the statistic may operate on — e.g., BaselineAge |
| Min Count | Minimum number of records that must match before any result is returned |
Example policy
Researchers Alice and Bob may compute means and Kaplan–Meier curves against
BaselineAgeandEventTime, as long as at least 10 records match. No one may retrieve a single row of data.
This is the policy posture that most rare-disease consortia would want to adopt. OXFORDIA makes it the default.
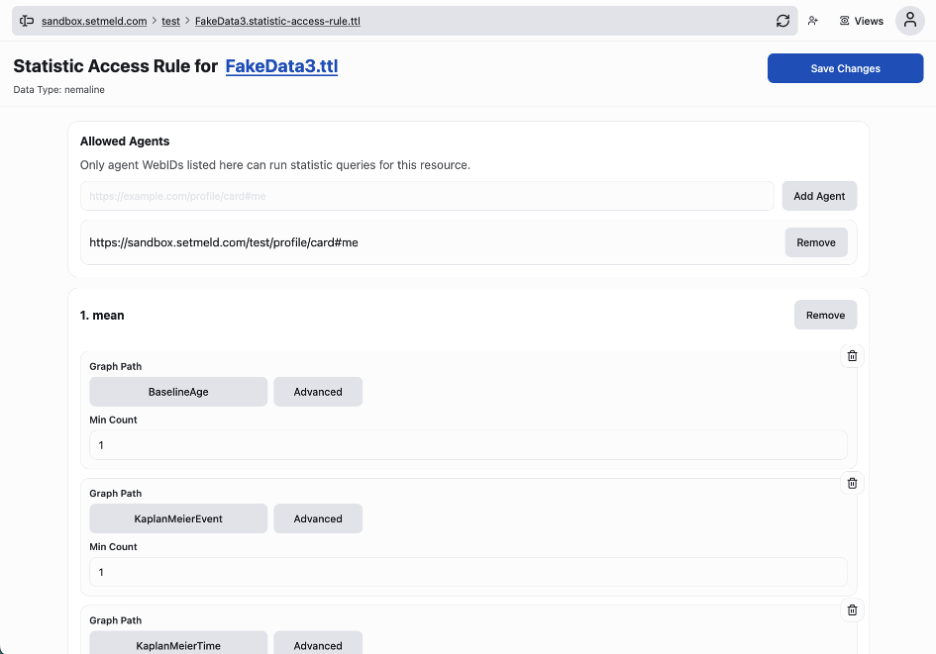
Adding a rule
- Enter the researcher's WebID in the Allowed Agents field and click Add Agent.
- Under the statistic section (e.g., 1. mean), set the Graph Path and Min Count.
- Repeat for each statistic and graph path you wish to authorize.
- Click Save Changes.
Min Count
The minCount constraint prevents a rule from being used to read out individual records. If a query would return a result derived from fewer than minCount records, the node rejects it and returns nothing.
Set minCount to at least 5 for any externally-accessible dataset. For sensitive cohorts or tail analyses (survival curves), use a higher threshold.
5. Copy the dataset URL
Each dataset has a stable URL that researchers use to query it. Click Copy data url next to the dataset in the dashboard. Share this URL with researchers who will be querying your node.